
The concepts behind the use cases, in the order they build.
Anatomy of an agent
You’ve put an AI team to work. Now make one of its agents work your way.
- Open a working agent, make a change, and run your version.
- You don’t have to build an agent from scratch: start with one that works, then shape it around how you work.
- A working agent you’ve changed yourself and used on your own work.
- About 20 minutes.
- Claude Desktop or Cursor connected to your project, with the BlueRock toolkit installed and
/bluerock:checkpassing.
What makes an agent work
Before you change your first agent, it helps to know what’s inside one. Setting up an agent is like onboarding someone to a job: you define who they are, what they’re responsible for, what they know, what they can use, and what a good result looks like. Those five parts are the building blocks you’ll shape as you create agents that work the way you do.
- 1IdentityWho is this? Persona, lens, voice.
- 2JobWhat is it responsible for? Scope and procedure.
- 3ContextWhat does it know? Sources, files, memory.
- 4ToolsWhat can it do? Read, write, search, call APIs.
- 5OutputWhat does “good” look like? Format, length, guardrails.
You don’t need to master all five today — you’ll start by changing one part of a working agent and seeing what happens.
What you’ll do in Claude Code
We recommend doing the hands-on work in Claude Code, where you’ll be guided step by step. Prefer to follow along here? Use the instructions below. You’ll work with scribe, a note-filing agent already in your project. Every agent is configured by a markdown file called its spec — plain text you can open and change to instruct it or change how it behaves. Keep this page open if you want to reference the steps.
- 1
Paste the line below into Claude Code.
teach me Session 3
You’ll see: Claude Code loads Session 3 and introduces scribe. (You can also type
/bluerock:learn— it picks up wherever you left off.) - 2
Tell scribe one real thing that happened today, and watch it file the note — a whole job done, not a question answered.
You’ll see: a note filed into
notes/and sorted into sections. - 3
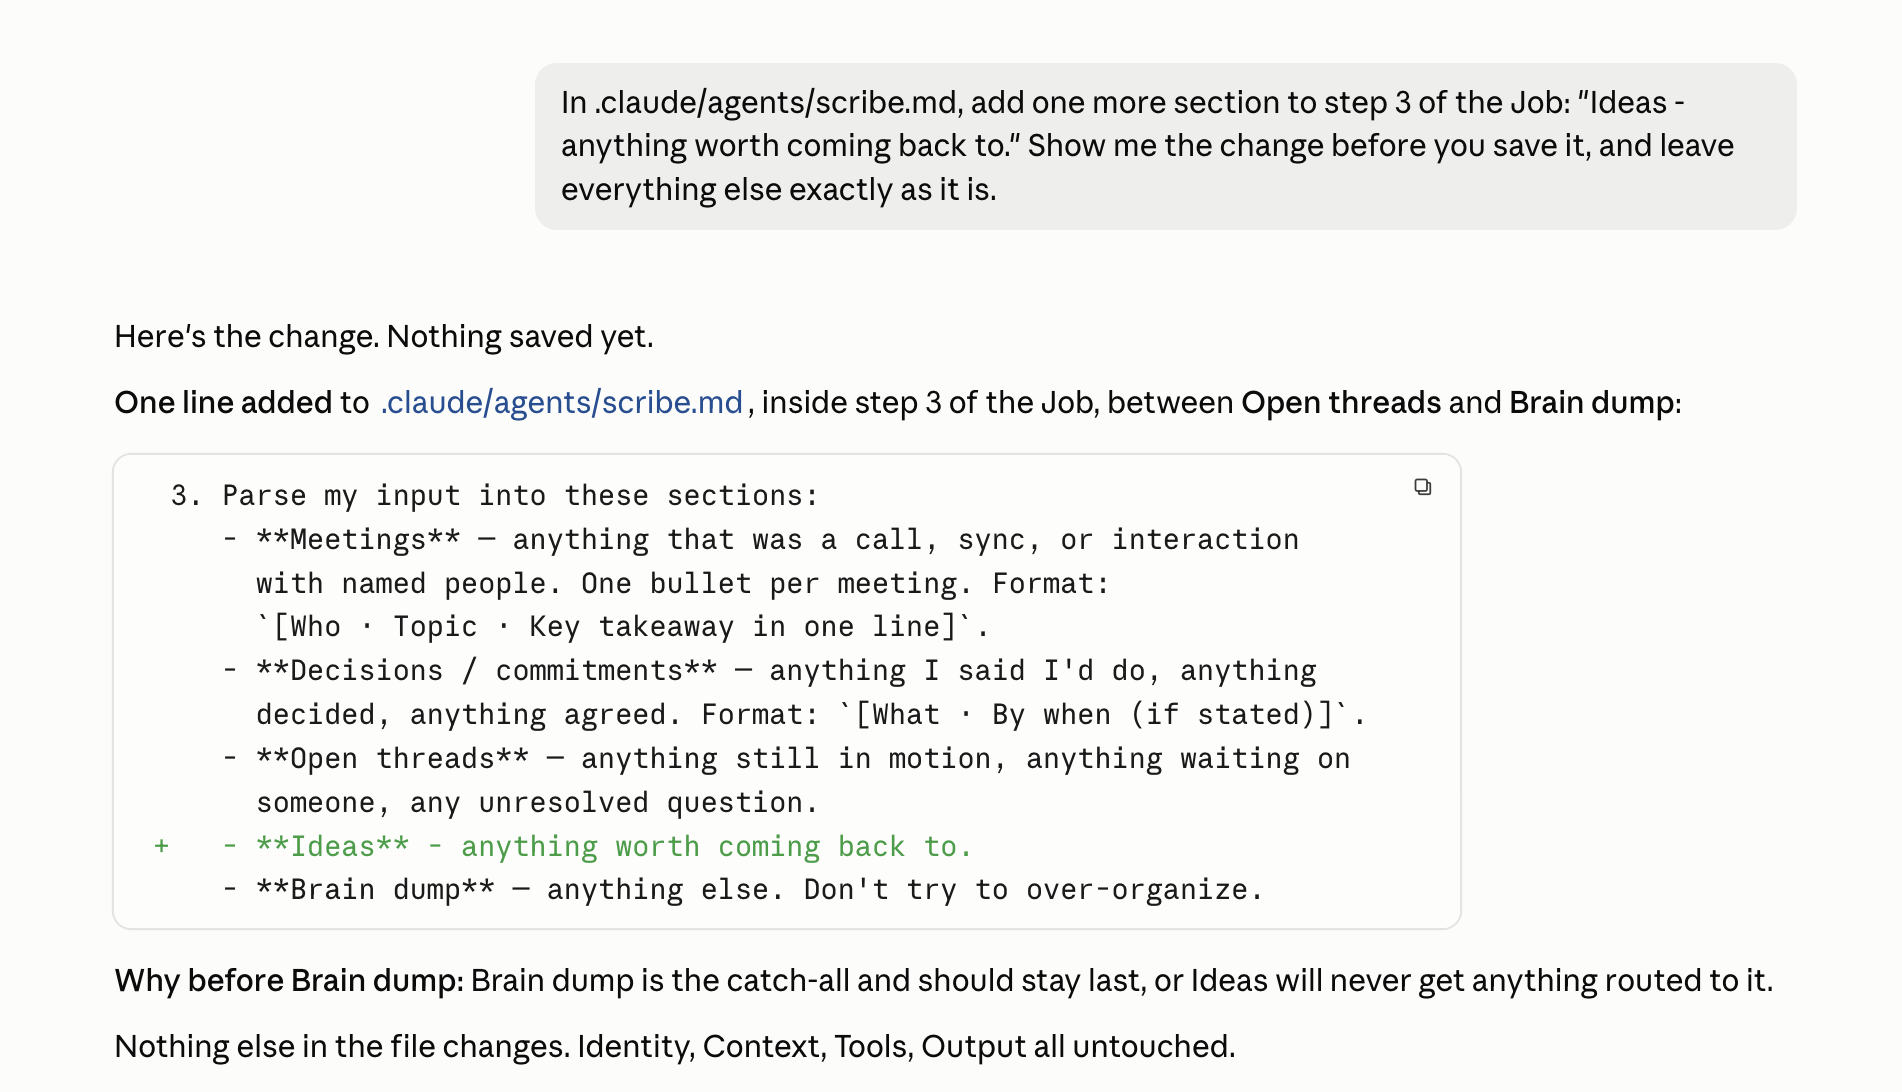
Ask it to add a section to its own spec, then read the one-line change and approve it.
You’ll see: the one-line edit to scribe’s own spec, waiting for your approval. That is the whole of building, here.
- 4
Run it again on your real day and open the file to see your change land.
You’ll see: your real day filed again, with the new section now filled in.
- 5
Type
/bluerock:wrap-upto close out the chat.You’ll see: the run logged to your dashboard, your change saved with your project.
Recap
You just changed how a working agent behaves. You read scribe’s five parts — an identity, a job, the context it reads, the tools it can use, and the output it produces — edited one line, and ran it again, and the output changed with it. That edit loop, read then change then run, is the whole method.
You can change how an agent works, not just use it. An agent is configured through a markdown file: plain text you can read and edit, with no hidden layer in between — so instructing it or changing its behavior means changing that file. You started from something that ran, and changed what you needed.
Practice
Use scribe on real work, three days running — three days is where a seeded agent stops being a demo and starts being yours.
- File your notes with scribe on three real days, and notice: what does it get right? What do you keep correcting? What do you wish it knew about you or your work?
- When you spot something, change one line the way you did today, and run it again.
- Gather two short writing samples you’re proud of, like a post or an email. Session 4 uses them to teach your agent how you write.
What’s next
Give your agent memory
You've changed how an agent works. Next, you'll teach your project who you are and how you work, so results come back sounding like you.
Start Session 4Build with it
Every use case is a team, a skill, or a schedule like the ones this path teaches. Pick one and put it to work.
Pick a use caseWhat would you want an agent to do?
Ask for it in Slack. We will add new agents and skills to the BlueRock Builder Toolkit.
Learn more
Want to understand a little more about what just happened? Open these for a quick look behind the scenes.
What makes an agent different from a chatbot?
A chatbot answers in one turn. An agent does multi-step work: it reads files, uses tools, follows a procedure, and returns a finished result — which is what you just watched scribe do. It didn’t answer a question; it did a job. One thing to know about the model underneath: it generates the most likely next words, not verified facts. That is why a good agent spec names what it must never invent — scribe’s “append-only, today-only” rule is exactly that, made safe.
What are agents, skills, and subagents?
You’ll see these terms as you work more with AI. An agent is an AI worker given a specific job, instructions, and the tools it needs to do that job — scribe is one. It works in its own context window, the model’s working memory for one conversation, so it never sees yours. A skill is a reusable set of instructions that helps an agent perform a particular kind of work. A subagent is a specialized agent that handles one part of a larger job on behalf of another agent or team. You don’t need to master these terms yet — for now, the important idea is simple: different agents can take on different parts of a job and work together to produce a result.
The AI and building terms these sessions use are collected in the glossary.