
The concepts behind the use cases, in the order they build.
Connect BlueRock to your AI tool
Your BlueRock Cloud AI Workspace is already set up. In this step, you’ll connect it to Claude Desktop or Cursor and make sure everything is working.
- Connect your AI tool to your BlueRock workspace.
- BlueRock gives your AI a dedicated cloud workspace where your projects, tools and context can stay together as you build.
- BlueRock connected and ready for your first build.
- About 10 minutes.
Where will you build?
Choose the AI tool you want to build with. Your setup steps will be slightly different, but the learning path is the same.
Claude Desktop setup
Set up the BlueRock Connector
Now that your account and workspace are already running and you copied the Enrollment URL from the Home page in the BlueRock console, use that link to sign in with the BlueRock Connector. The BlueRock Connector connects Claude Desktop on your computer to your BlueRock Cloud AI Workspace.
- 1
Download the Connector for your computer.Download for macOSDownload for Windows
- 2
Put it where you’ll find it again. On Mac, unzip it and move the BlueRock Connector to your Applications folder. On Windows, the download is the app itself — move it to your Desktop. Either way, you’ll open it from there every time you come back.

This is the app you're looking for once the download finishes. - 3
Open it.
You’ll see: the Connector opening on its Set Up Connector screen, and its icon arriving in your menu bar on Mac or your system tray on Windows. Clicking that icon is how you get back to reconnecting.
- 4
Click Continue on the Welcome screen, then Next on Authenticate, keeping Sign in with BlueRock selected.
- 5
Paste your Enrollment URL into the field and click Sign in.
- 6
Finish signing in in the browser window that opens, approve the connection, and return to the Connector.
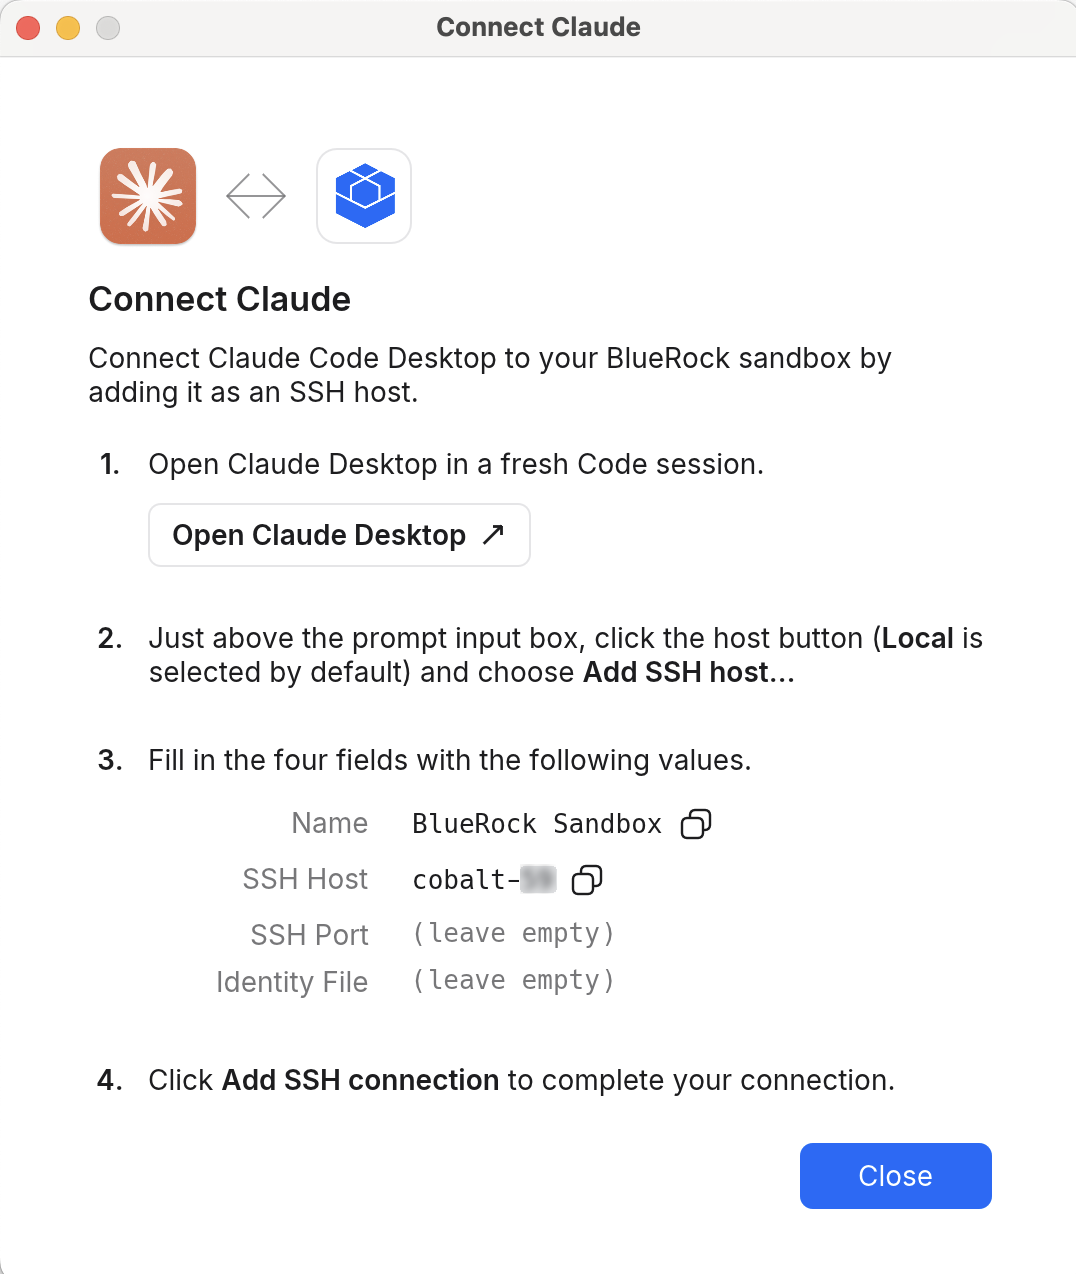
The Connector’s Connect Claude dialog. You’ll copy Name and SSH Host from here in the next step, using the button beside each. The last digits of your host are blurred because they are yours; the rest of the value looks the same for everyone. You’ll see: a success message in the Connector’s log once you are signed in.
The Connector is signed in to BlueRock and knows your workspace.
My browser or computer warned me about the download
That is the normal prompt for any newly installed app. The Connector is signed. On Chrome, choose Keep if the download is held. On Windows, SmartScreen may say the app is not commonly downloaded; if you got it from the links above, it is safe to run. Windows unwatched; see the walkthrough list.
Before you start
- Claude Desktop, installed and signed in to your Claude account.
- A paid Claude plan. The free plan does not include Claude Code.
Connect Claude to your workspace
Now connect Claude Code to the BlueRock workspace you just set up. Everything from here happens in Claude Code, which is the Code tab at the top left of Claude Desktop. Claude works on your own computer unless you tell it otherwise, so this step points it at your workspace instead. Claude calls a computer it reaches over the network an SSH host; yours is the workspace the Connector just set up.
- 1
Go back to Claude Desktop, click Code at the top left beside Home, and start a new chat. You will be interacting with Claude Code for all of the sessions going forward.
Home and Code, top left. Click Code and the sidebar changes — that's how you know you're in the right place. (6s clip) - 2
Click the host button above the prompt box — it says Local — and choose Add SSH host.
Picking the host: the button above the prompt box reads Local until you change it. Add SSH host opens the dialog you’ll fill in next. (5s clip — use Expand to see it full size.) - 3
Copy Name and SSH Host from the Connector’s Connect Claude screen into Claude Code. Leave SSH Port and Identity File blank.
- 4
Click Add SSH connection and keep the default Auto mode.
You’ll see: SSH configuration created successfully.
- 5
Choose
my-workspacewhen it asks which folder to open, and confirm you trust it.You’ll see: the header showing the BlueRock Sandbox host and the
my-workspacefolder. - 6
Send one plain message to finish connecting — try “what’s in this project?”
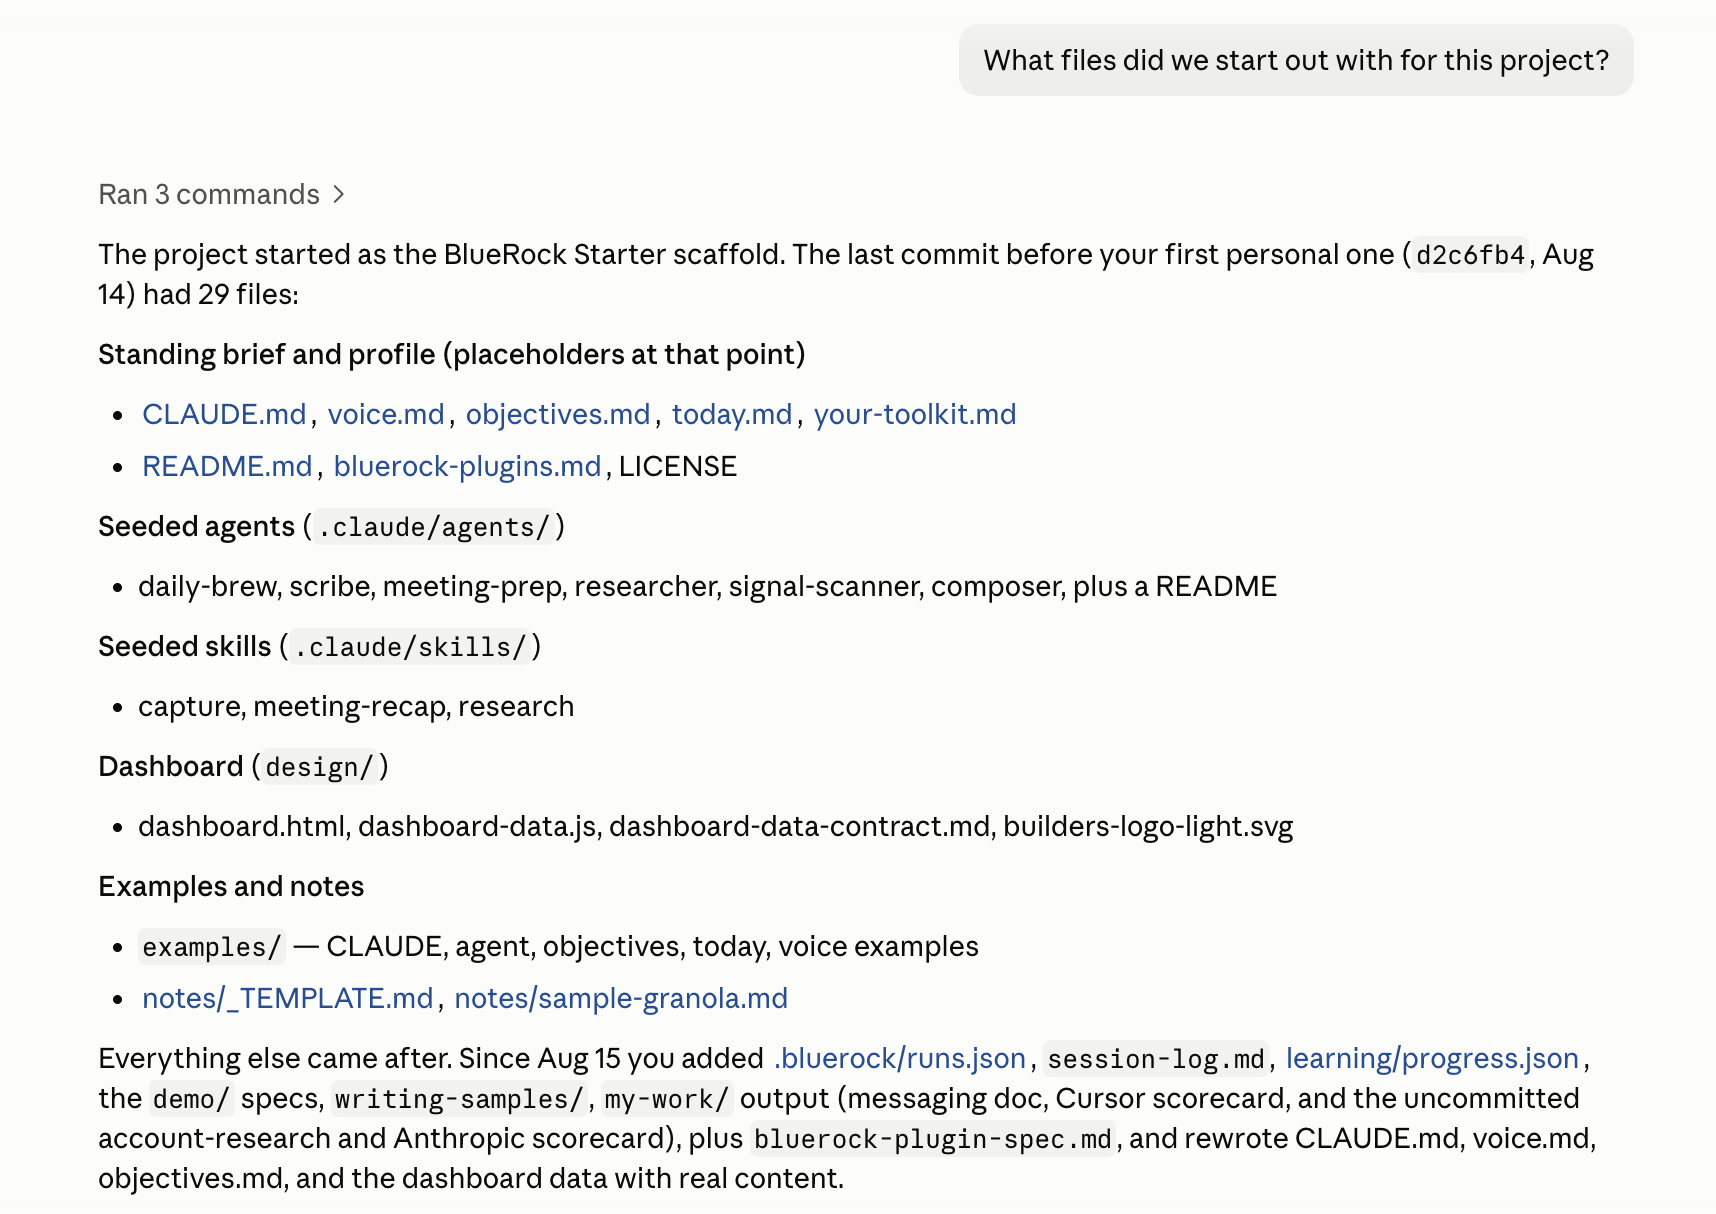
The connection working: ask what is in your project and Claude reads it back — the starter files, the seeded agents and skills, and the dashboard. Your own answer will list your project, not this one. You’ll see: Claude may ask permission before it reads your project — approving is you deciding what it may touch.
- 7
Type the command below.
/bluerock:check
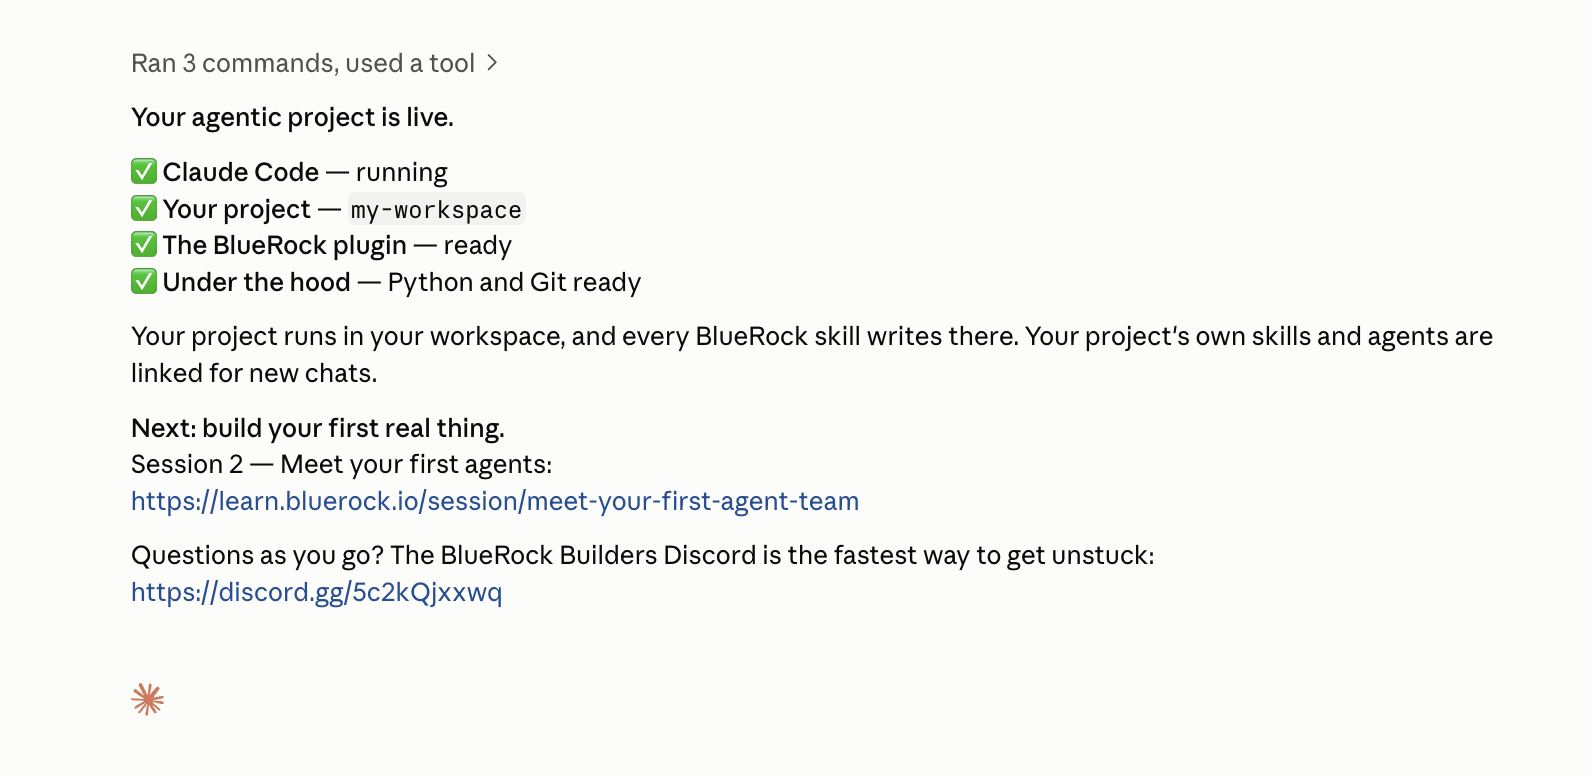
The all-clear: your project named and live, four green checks, and the pointer to Session 2. This exact report is your pass state. You’ll see: a short all-clear naming your project and confirming it is live.
/bluerock:check reports your project is live.
It says Connection failed, or the host won’t add
Connection failed: ECONNREFUSED means the Connector isn’t connected. Open the BlueRock Connector from your menu bar (Mac) or system tray (Windows), check the status circle is green, then try again. If the circle won’t go green, sign in again with a fresh Enrollment URL from the Console.
Copy the Name and SSH host values from the Connect Claude dialog rather than typing them. They are unique to your workspace, and a typo here is the most common reason the host will not add.
Two different accounts, on purpose. BlueRock signs you into your workspace. Your own paid Claude plan powers Claude. If a sign-in asks for Claude, use your Claude account, not your BlueRock login.
Command not recognized? You likely ran the check before sending a plain message — send one, then try again. Can’t find your project? You are in the wrong window: reconnect to your workspace and run the check again.
You can now put AI to work inside your own cloud workspace, not just chat with it in a browser tab. That was the one-time setup, and /bluerock:check confirms it any time something looks off.
Coming back tomorrow
Connect to your BlueRock Sandbox and continue building in my-workspace.
- 1
Open the BlueRock Connector app.
- 2
Click on the icon. It appears in your menu bar on Mac, or your system tray on Windows. The status circle is green when connected.
- 3
Open Claude Code on
my-workspaceand start a new chat. - 4
Prompt to pick up where you left off.
I’m continuing work in my project. What did we do last time, and what’s next?
Or run the next use case straight away (its command is on its page). To continue the learning path instead, type
/bluerock:learn.
Something isn’t connecting
- No Connector icon in your menu bar?
- The app isn’t running — it doesn’t start by itself. Find it where you saved it and open it.
- The circle isn’t green?
- Your connection expired, which is normal. In the BlueRock Console, open your workspace’s Connect page, copy a fresh Enrollment URL, and paste it into the Connector, like you did in Step 1.
- Connector green but Claude still shows an error?
- Fully quit Claude Desktop and open it again.
As you start building, you’ll see more of these. Claude asks before it reads, writes, or runs something.
- Read-only check —
- usually Allow once.
- Writing in this project —
- check what’s changing, then allow.
- Credentials, deleting, publishing, sending —
- stop and read it properly.
What’s next
Build your first deliverable
You’re connected. Pick a use case and get a shareable result in about 15 minutes; your context and the build stay in your workspace.
- Brand Messaging DocWrite your positioning, voice, and proof points down once, in your own words, and see where your website drifts from them.
- Account ScorecardTurn a company name into a scored account brief based on the criteria that matter to your team.
- Competitor BattlecardsTurn competitor research into a sourced card per competitor your team can take into a deal.
- Account Signal DigestTurn account activity into a prioritized view of what changed and what deserves attention.
- Answer Engine VisibilitySee how AI answer engines describe your company, where you’re missing and what to improve.
- Sales Outreach PrepTurn a prospect list into a researched outreach kit: who they are, why now, and what to say.
- Process to SkillTurn a process only you know how to run into a skill you can save, improve and run again.
The concepts behind the use cases
Every use case is a small team of agents doing one job. Seven short sessions explain how that works, in the order they build. Come back to them after your first build, or whenever you want to understand what ran.
See the learning pathYou’re set up. Come and say hello.
The BlueRock Builders Slack is where builders trade what they’re making, ask when something looks wrong, and see what other people’s projects actually look like. Say what you just got running in #builders-start-here.
Learn more
Where does my work actually go?
Four places, and only one of them is where your work is kept.
- Your workspace
- Your project files, agents, notes, and saved work. The folder is called my-workspace; the work inside it is your project
- Your chat
- The conversation. Useful, but not where your work is stored
- A Claude Artifact
- The polished version you open and share. The source is saved in your project too
- GitHub
- A backup of your project that you’ll connect later, just before you put work on a schedule
You don’t need to hold all four yet. You have not made anything yet, so this lands properly in the next session, when you have a finished document to find.
What did I just install, and does it stay current?
The BlueRock plugin. It’s how the skills and agents you’ll use arrive in your project, and it keeps itself current. Every new chat checks for a newer version in the background. When there is one, it downloads during that chat, and the chat after that one runs it. Opening a couple of chats a day keeps you current without doing anything. If you stay in one long chat, a new session or skill won’t appear until you start a fresh one.
The AI and building terms these sessions use are collected in the glossary.