
Save your work
Everything you’ve built so far lives in your BlueRock workspace. Before you put an agent on a schedule, you’ll back the project up to a private GitHub repository you control.
- Back your project up to GitHub, and watch it happen.
- Scheduled routines need a persistent copy of your project they can reach while you’re away. GitHub provides that copy and gives you a backup you control.
- A private repo under your own GitHub account, with your project inside it.
- About 10–15 minutes. Claude Code will guide you through setup and help resolve common issues.
Before you start
- Claude Desktop or Cursor connected to your project, with the BlueRock toolkit installed.
/bluerock:checkconfirms both. - Your email inbox, somewhere you can open it: a new GitHub account verifies your email address.
Your first backup
Create your GitHub account
GitHub is the free service your backup will live on, in an account that belongs to you, not to BlueRock. If you already have an account, sign in and move to the next step.
- 1
Go to github.com/signup and create an account with your own email address. The free plan is all you need.
- 2
Enter the verification code GitHub sends you.
You’ll see: the code arriving in your email inbox.
- 3
Finish signing in.
You’ll see: your avatar in the top-right corner of github.com. That means you’re in.
You’re signed in on github.com.
The verification email never arrived
It goes to the address you typed, and it sometimes lands in spam — check there first. Still nothing? Re-request the code from the signup page rather than starting over.
Sign your workspace in to GitHub
Your workspace has to be able to talk to your GitHub account. GitHub’s sign-in does this with a one-time code, so your password never touches the workspace.
- 1
In your chat, ask for the backup.
back up my project to GitHub
Or type
/bluerock:learn-save-your-work. Either way Claude Code takes it from here: it checks where you already are and skips what’s done. - 2
Wait while Claude Code runs GitHub’s sign-in.
You’ll see: a one-time code shaped like
XXXX-XXXXand the addressgithub.com/login/device. - 3
Open github.com/login/device in your browser, type the code in, and approve it. That code is a live sign-in code while it lasts:
github.com/login/deviceis the only place you ever type it. - 4
Back in your chat, answer the one setting Claude Code asks about: it makes your workspace use this sign-in whenever it talks to GitHub, and it asks before it sets it.
You’ll see: Claude Code confirming your workspace is signed in, with your GitHub username.
Claude Code reports your workspace is signed in to GitHub as you.
Create your private repo — from right here
A repository (repo) is the container your backup lives in on GitHub. Now that your workspace is signed in, Claude Code can make one for you — no form to fill in, and nothing to get wrong.
- 1
Tell Claude Code to create it, and give it a name you’ll recognize:
my-workspaceis the obvious one.You’ll see: the repo’s address come back in the chat. It is private, on your account, and your project is already pointed at it.
- 2
Read back what it reports: the repo is private, and your project now has somewhere to send its saves.
You’ll see: one more line worth reading: nothing has been sent up yet. The repo is empty on purpose until the next step, so an empty page on GitHub right now is correct.
A private repo exists on your account, and your project points at it. Nothing is in it yet — that is the next step.
I’d rather make it on github.com myself
That works, with one thing to get right: the repo has to start completely empty, because your project brings its own history and a repo born with starter files can’t accept it. On github.com, open the + menu and choose New repository, name it, check that Choose visibility says Private, and leave every starter file off — Add README off, Add .gitignore on No .gitignore, Add license on No license. You’ll know it worked when GitHub shows a mostly empty page headed Quick setup; a list of files instead means a starter option got ticked, so delete the repo and make it again while nothing of yours is in it.
Send everything up
Two guards run before anything leaves your workspace, and Claude Code names each one as it goes. Watching them run is part of the step.
- 1
Copy the repo address from the Quick setup page (the one starting
https://github.com/) and paste it into your chat when Claude Code asks where the backup should go. - 2
Answer the checks. Claude Code may ask to switch your backup address off BlueRock’s shared template, or for the name and email your saves should be recorded under. That second ask can be surprising right after signing in: signing in proved to GitHub that you’re allowed in, but the name on each save is written separately — it was never set by the sign-in.
You’ll see: each ask saying what it is for before you answer it.
- 3
Wait while the guards run.
You’ll see: the secrets scan reporting what it checked (nothing goes up until it comes back clean) and, on some workspaces, a line saying your project’s shortened history was completed first. Both are guards protecting the backup, not problems.
- 4
Give the go-ahead when Claude Code shows you what’s about to go up.
You’ll see: a plain report that everything saved in your project went up to your repo.
Claude Code reports the backup went up. The proof is yours, in Step 5.
See your files on GitHub
The backup becomes real when you see it yourself.
- 1
Go back to the repo page in your browser (the one you kept open) and refresh it.
You’ll see: the Quick setup page replaced by your own files.
- 2
Open one file you recognize and read a line of your own work.
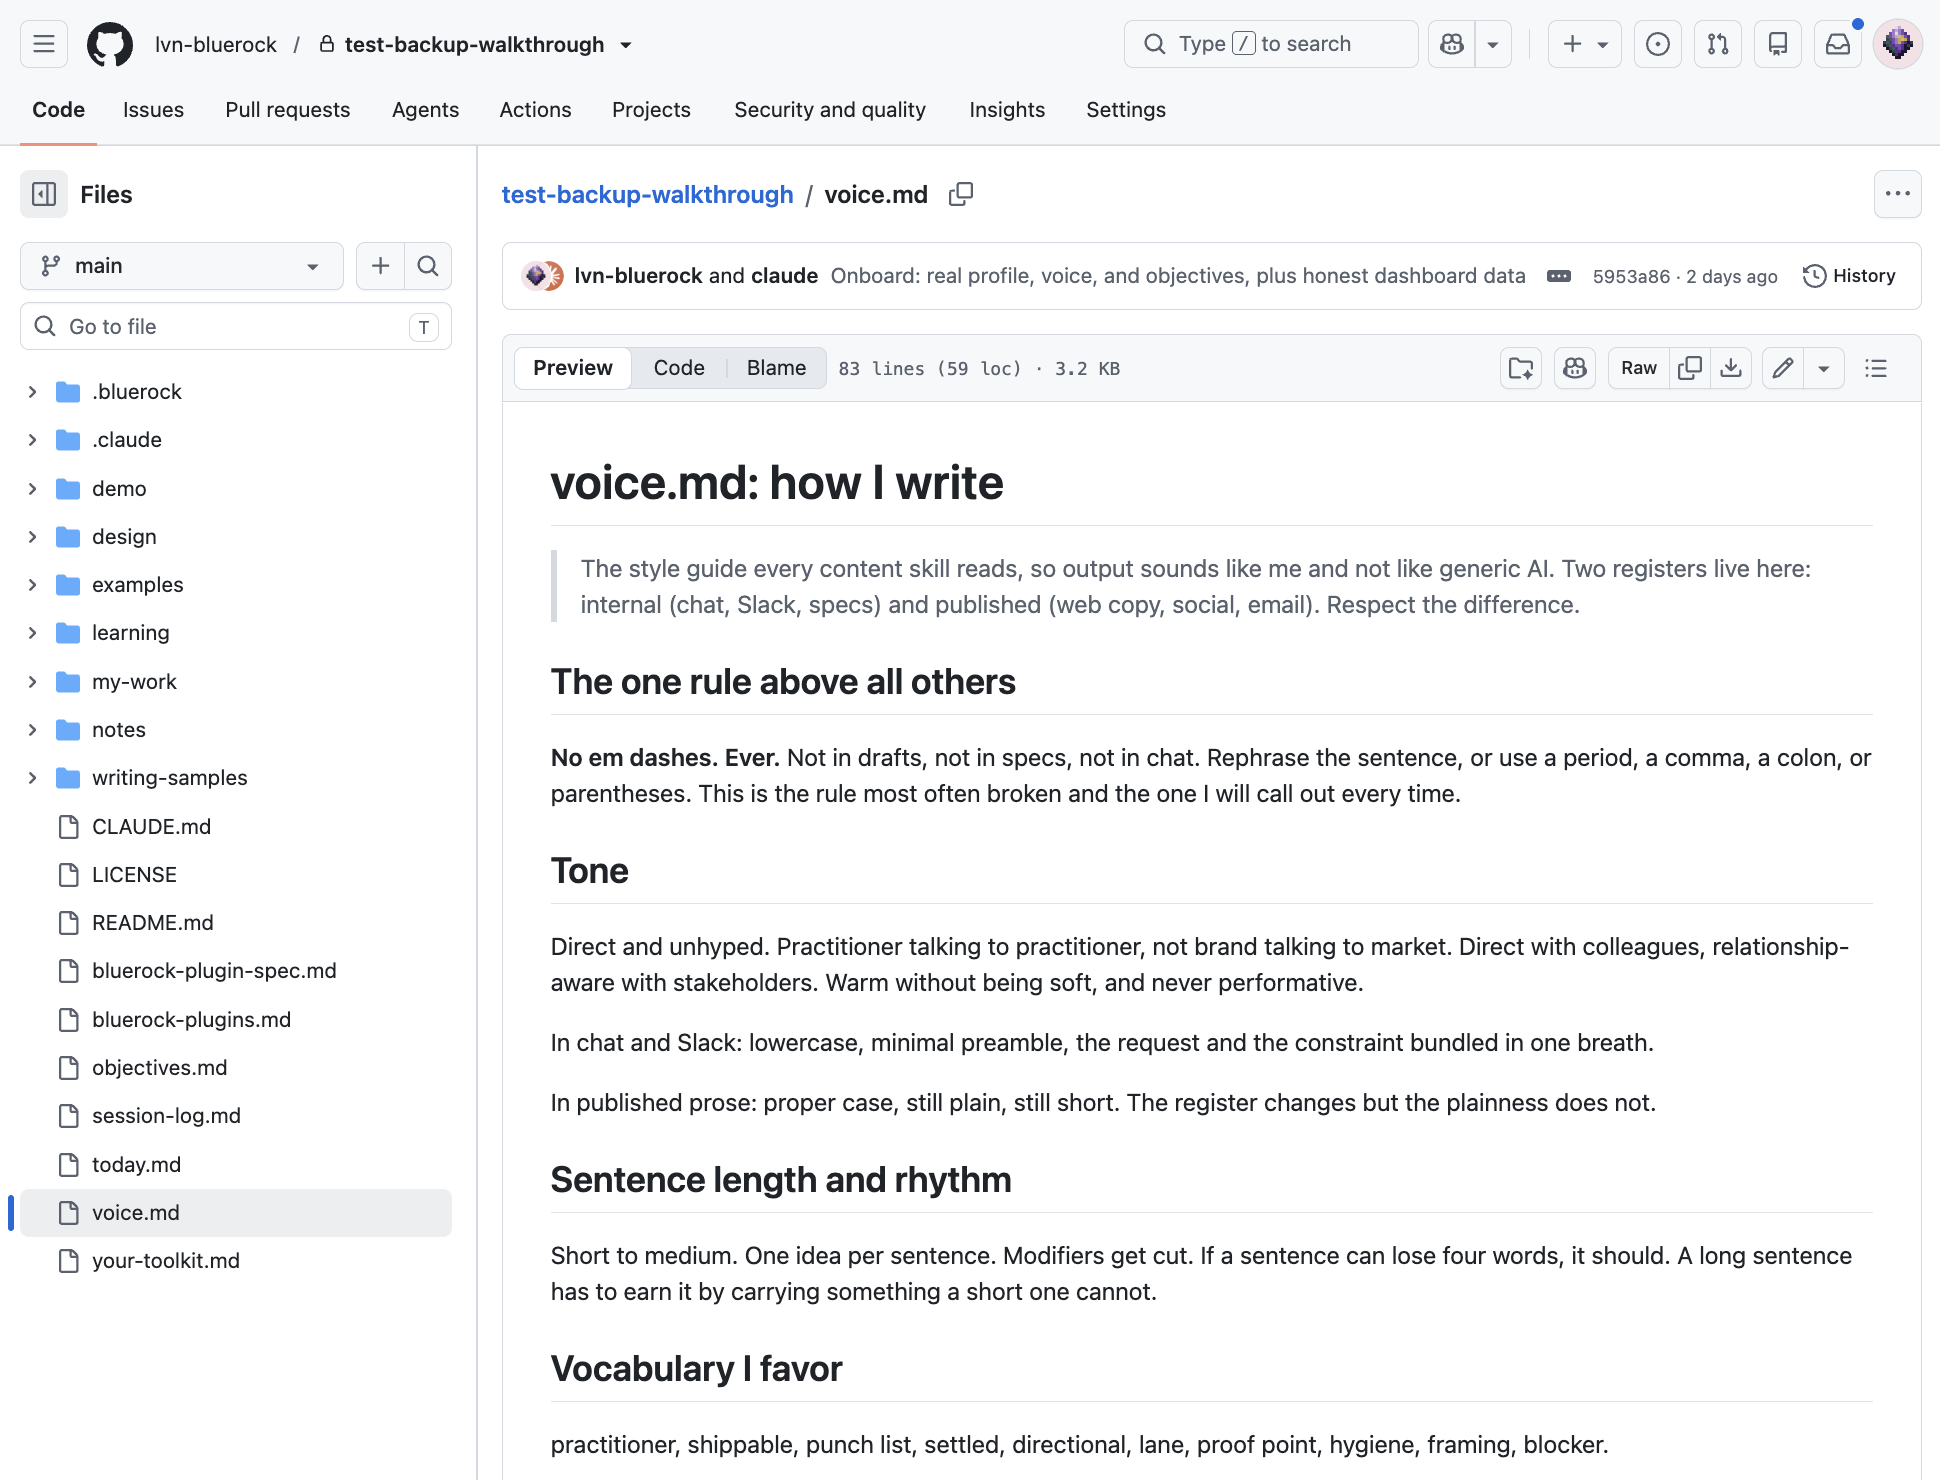
Your project is on a page only you can see, in an account only you control. That page is the backup.
Your work now outlives your workspace: everything you build is backed up to a repo that belongs to you, not to BlueRock. From now on the backup is one yes — every time you close a chat with /bluerock:wrap-up, it offers to send up whatever changed. And like connecting was, this was one-time: the sign-in survives disconnects.
What’s next
Put an agent on a schedule
Your work is backed up, which is exactly what a scheduled agent needs: a routine runs against your repo on GitHub, and yours now exists.
Start Session 7Build with it
Each of these is an agent team like the one you just assembled.
- Brand Messaging DocWrite your positioning, voice, and proof points down once, in your own words, and see where your website drifts from them.
- Account ScorecardTurn a company name into a scored account brief based on the criteria that matter to your team.
- Competitor BattlecardsTurn competitor research into a sourced card per competitor your team can take into a deal.
- Account Signal DigestTurn account activity into a prioritized view of what changed and what deserves attention.
- Answer Engine VisibilitySee how AI answer engines describe your company, where you’re missing and what to improve.
- Sales Outreach PrepTurn a prospect list into a researched outreach kit: who they are, why now, and what to say.
Backups are where builders get stuck.
If yours didn't go smoothly, post what you saw. Someone else has almost certainly seen it too.
Learn more
What’s the difference between saving and backing up?
Saving a checkpoint takes a snapshot of your project as it is right now, with a note about what changed. It stays in your workspace, and you can look back at it or undo it. Backing up to GitHub is the second, separate step: it sends your saved snapshots to your repo, off this machine. Until you back up, a snapshot exists only in your workspace. That is why this step exists, and why wrap-up offers both.
What did I just authorize, and can I take it back?
Your workspace now holds a sign-in to your GitHub account, which is what lets it send backups without asking for a password every time. You granted it yourself, on GitHub’s own page, with the one-time code. You can see it any time on github.com under Settings → Applications → Authorized OAuth Apps — it’s the entry called GitHub CLI, and its own menu is where you revoke it. Revoking stops future backups until you sign in again; your repo and everything already in it stay yours.
Why did the repo have to be empty?
Your project has been keeping its own history since the day your workspace was created: every checkpoint you saved is in it. If GitHub starts the repo with a README, the repo gets a history of its own, one your project has never seen, and the two can’t be joined by a first backup. An empty repo has no history yet, so it accepts yours exactly as it is. That’s also why the fix for a non-empty repo is delete-and-recreate rather than repair: before your first backup there is nothing in it to lose.
The AI and building terms these sessions use are collected in the glossary.